Genevieve from
SisterlyLove suggested a tutorial on the Pink & White Swirl Scarf so this is that attempt. I apologize this is my first tutorial over the internet/with pictures so please be patient. If you have any advice or suggestions, they are most welcome :)
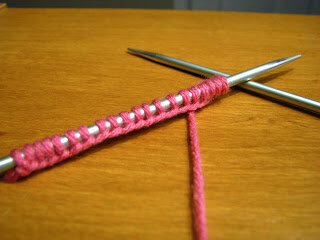
Cast on 16 stitches for your cable, and as many stitches as you want along the side of it. Note: I only had 2 stitches on either side and that wasn't enough to balance the twist of the cable. I would recommend at least 4 stitches on either side if not 6, like I did in the Swirl Scarf (P2K2P2).
Knit in pattern. For our purposes, let's say I had 4+16+4 stitches, so I would P4 K8.
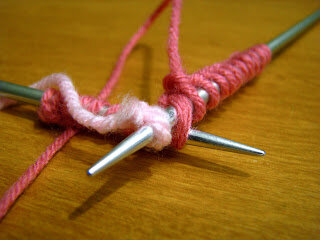
Then I add my second color, with a slip knot, I go in my 9th stitch like I'm going to Knit and instead of yarning around, I pull the slipknot of my new color through the stitch.
This helps to tide the tail of the new color. Leaving the first color's string on its last stitch, continue in your new color K8, P4.
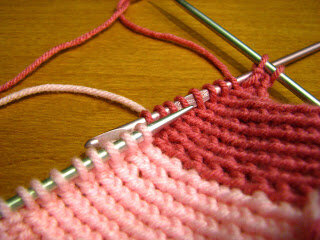
It should look like this when you're done with this row.
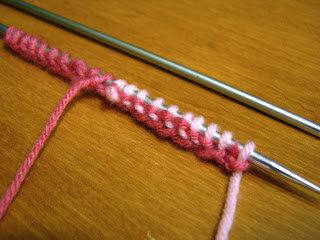
Turn, K4, P8. Now you've returned to your first color. Pull your last stitch snug (the lighter pink in my picture) and cross the strings. I usually wrap the string that I'm picking up bottom to top or right to left around the string I'm dropping so as to hide it under my new stitch.
(This took some remembering for me as it's been a while, so please excuse this picture, same wrapping technique, but switch the strings so the light is on top of the dark and the dark comes out under the right side of the lighter pink).
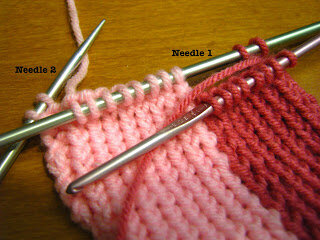
Once you've knit up enough rows that you are happy with, continuing to pull the meeting stitches tight & wrapping the strings between pick-ups, then we can start the cable row. P4.
Move the next 8 stitches (the first half of your cable) off the needle to a holding needle (I use my crochet hook instead of a "cable needle").
For this cable, I want my first color to be in front of the twist, so I move the hook to the front. Make sure your string is between the two panels so it doesn't leave a long string on the backside.
Continue K8 with your second color. Normally you would pull your first stitch tight to avoid a gap, but since this is a different string from your other stitches, it won't matter here. Just keep your first stitch snug as usual so it isn't extra loose.
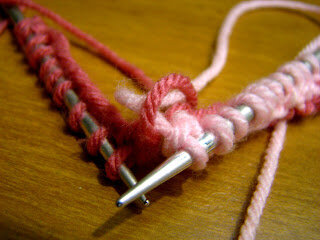
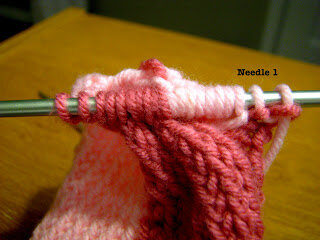
Return your first 8 stitches to your needle to be worked.
This is what it looks like right before starting the second half of the cable. For the string you dropped (lighter pink), don't worry about wrapping it with the second (darker) color. You will do that on your next row.
Making sure to use the appropriate color string, tighten your first stitch to avoid a loose stitch. K8. P4 (continuing with new color/ darker pink over the lighter pink).
Turn, K4, P8. Wrap strings like before (drop first color, weave new string from under, out to the right side), and continue with second color; P8, K4. Turn.
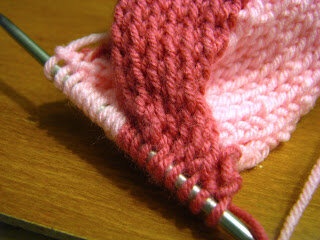
After you have continued in a few regular rows, the cable will become more visible:
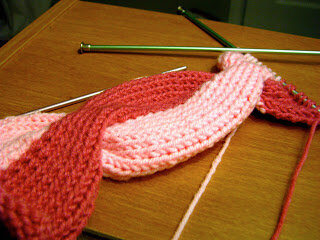
Continue in pattern, weaving strings until you are ready to make another cable. Repeat cable steps. Before you know it, you'll start to have something like this:
Obviously it needs a little tweaking, but this is the basic design concept. I hope you enjoyed it and if you try it yourself, I'd love to see/hear about it in the comments :)